

This step-by-step guide will teach you how to mould small bowls from self-hardening clay using our Clay Modelling Craft Kit. One they're dry, you can use the bowls to store your jewellery or as a safe place to keep your keys.
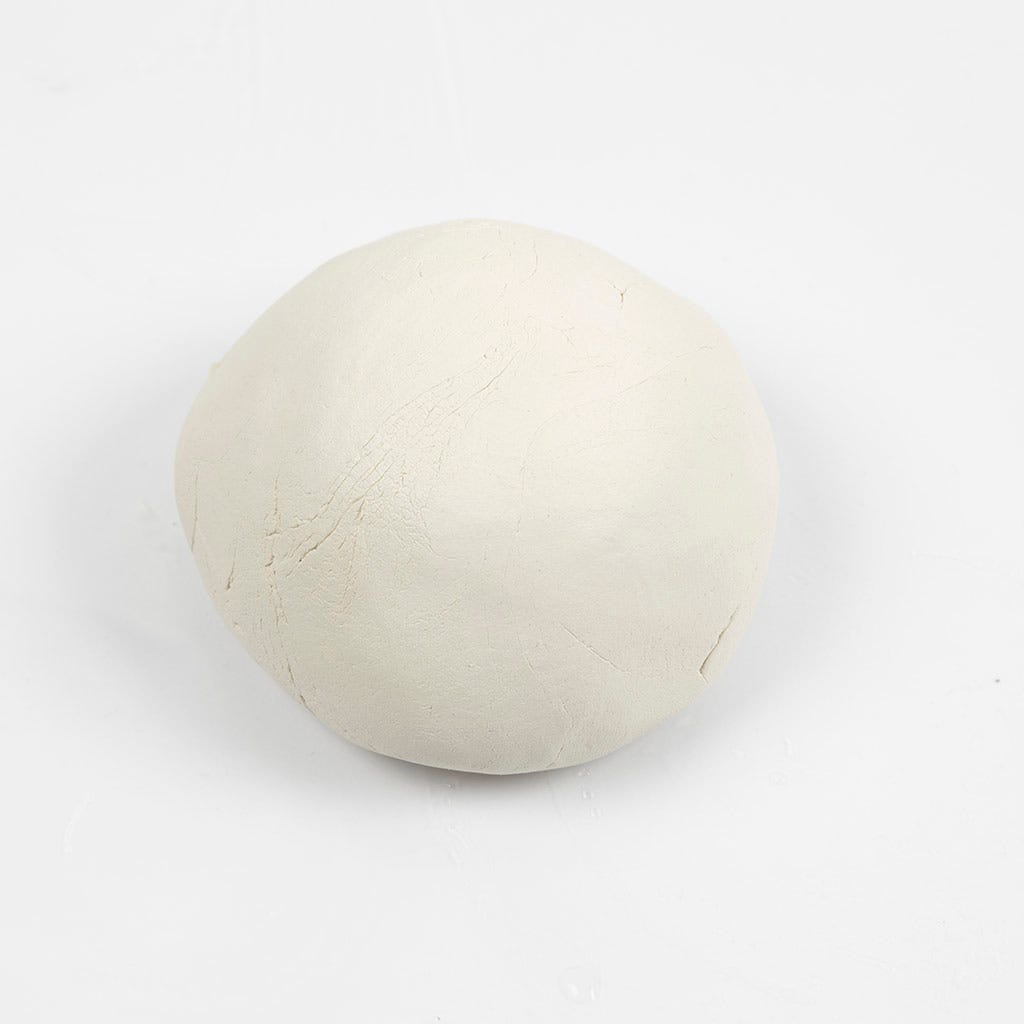
Step 1
Take the clay from your craft kit and begin to knead it until it's soft enough to shape. Divide the clay into two separate balls. Make one piece larger than the other so you can create two different sized bowls.
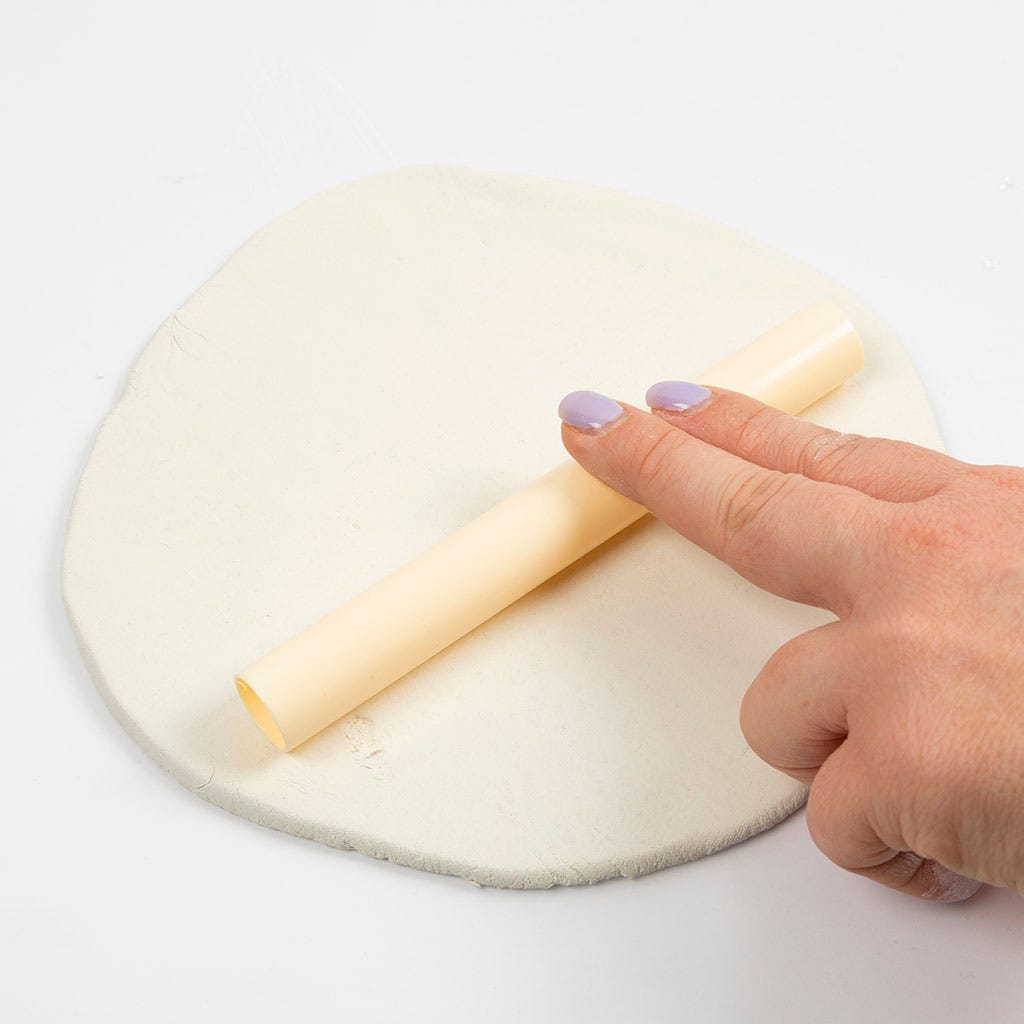
Step 2
Take the roller and start rolling out the clay until it's flat. Keep rolling until you have a thickness of about 5mm.
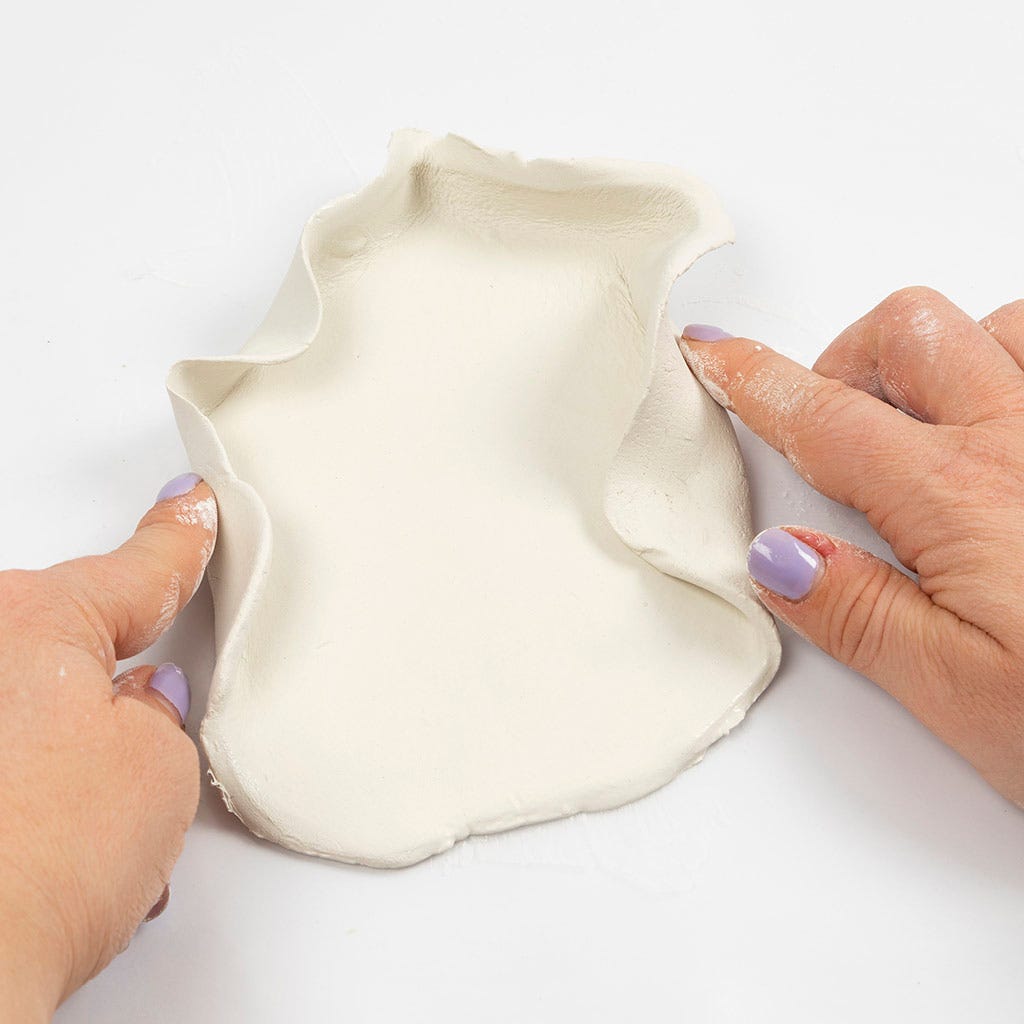
Step 3
Now you need to mould the clay into the shape of your bowl. Start folding up the edges with your fingers to create a wavy edge.
Step 4
Once you're happy with your bowls shape, use your fingers to add a little water to the bowl to smooth out any cracks. Leave the clay to dry for 48 hours.

Step 5
If you notice any cracks once the clay has dried, you can fix it by wetting the clay where the crack is and moulding a small bit of clay into the crack. Smooth out the clay and let it dry again.

Step 6
Take the paint from your Clay Modelling Craft Kit and ger creative decorating the bowls. Once the paint is dry, you'll have two unique bowls to store your jewellery or other small treausres.


